

How To Activate Vpn In Windows 7

Usually (about 99% of the time), VPN is used by corporate users to connect back to their Corp. network to go access to their file shares, SharePoint servers blah blah blah.
Occasionally, however, VPN tin be used past home users to connect back into their home network (or on the other side of Mom's firewall when she needs <cough> tech support) to access their files or photos on their home boxes. To help with this, Microsoft built both the VPN customer and server into Windows 7. Before today, I wrote about the Server / Host side, and so let's jump into the client side.
How To Set Up A Abode-Based VPN Client With Windows 7
1. Click the Windows Start Orb and type network into the search bar. Then click the Network and Sharing Heart.

two. From the Network and Sharing Center, click the link to Set upwardly a new connection or network.

iii. Click Connect to a workplace, then click Next.

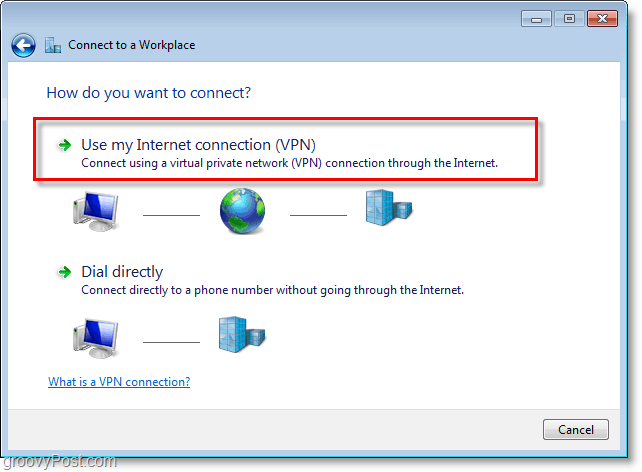
4. Click Utilise my Internet connexion (VPN.)
5. Under Internet address, type in your WAN or Global IP address. Under Destination Name: type in any description of what to phone call your connection. Then check the box Don't connect at present; but set up it upwardly so I can connect subsequently. Click Next to proceed.

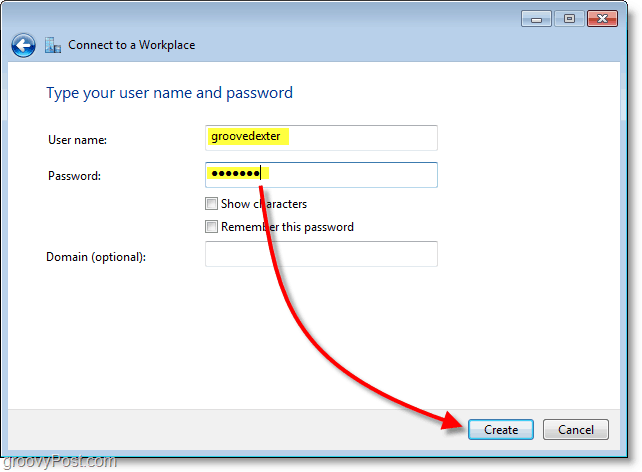
half-dozen. Type in the assignedUser Proper name and Password for the VPN host. Well-nigh likely, it's a user business relationship that exists to log in to the VPN host machine. Click Create when done.
Note: You can choose to Remember this password. However, a connection is more secure if you lot require credentials to be re-entered every unmarried time.
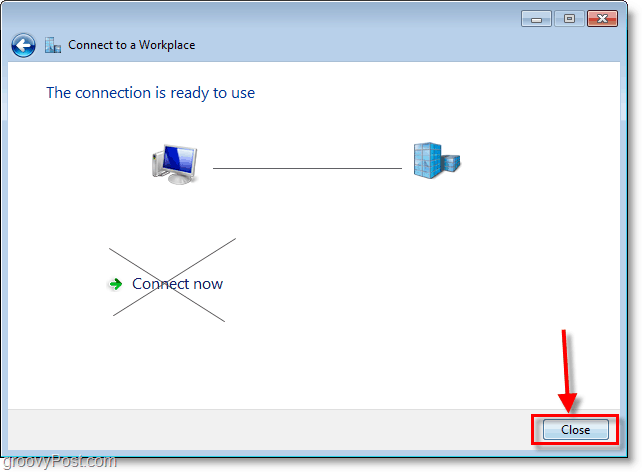
seven. We don't desire to connect just yet; a few settings need to exist adjusted to make the connection more secure. Click Close and then navigate back to the Network and Sharing Centre (shown in step 1).
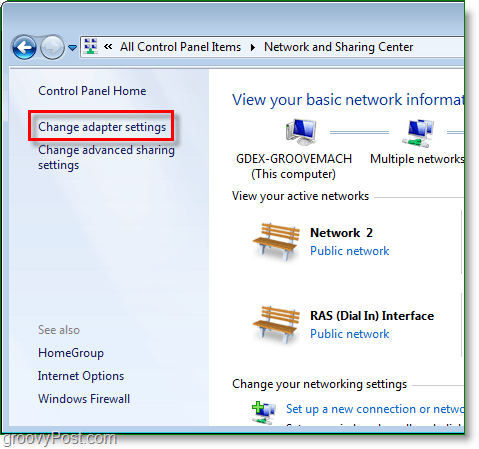
8. From the Network and Sharing Centre, click Alter adapter settings.
nine. Right-Click the newly created VPN Connection (Destination Name) and select Backdrop.

10. Click the Security tab and set Data Encryption to Maximum strength encryption (disconnect if server declines). Then below, make certain to cheque both CHAP boxes. Click OK to save and continue.

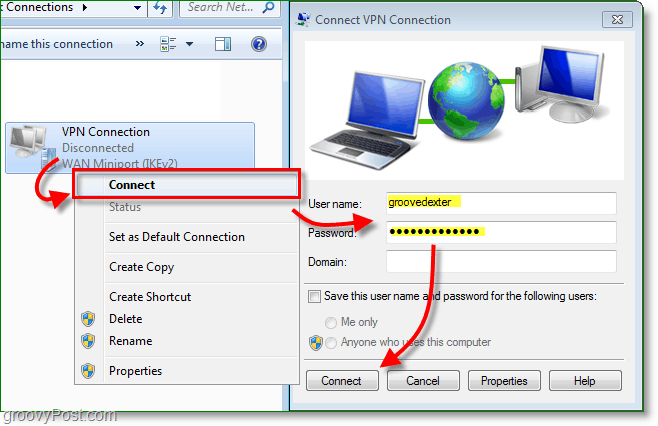
11. Adjacent, right-click the VPN Connection and this time select Connect. Type in the User name and Password, and so click Connect.
The VPN connection should now be alive.

Every bit a reminder, this is probably 1 of about 100 different configs for the VPN client, so unless y'all manage both sides (client and server), you volition probably need to get the correct client configs from your It team to become the VPN customer gear up perfectly.
![]()
Source: https://www.groovypost.com/howto/howto/setup-the-windows-7-vpn-client/
Posted by: howellmagery.blogspot.com
0 Response to "How To Activate Vpn In Windows 7"
Post a Comment